Bambu Lab’s H2C 3D printer is a powerhouse built for professionals, easy enough for beginners to use, and comes with a price tag to match. It’s been a minute since I’ve done any 3D printing. A couple of years ago, I got to try out the Ender 3 Neo, which I thought was neat, but ultimately couldn’t justify keeping around.
I thought maybe 3D printing wasn’t for me. As it turns out, I was very, very wrong.
What I didn’t like was how persnickety 3D printing was with a bedslinger machine was. The Ender 3 Neo didn’t have auto-leveling, which meant that any time the bed needed to be leveled again, and it often did, it was up to me.
Not only did it require a lot of time spent hunched over a machine, but it also allowed for a lot of human error. And as it turns out, I’m capable of creating a lot of errors.
Eventually, I wanted to dip my toe back into the world of 3D printing, but I didn’t know where to start. As I did research, a few brands kept rising to the top, with Bambu Lab consistently showing up as a reliable, beginner-friendly option.
And then Wes got to review the Bambu Lab P1S. Dear reader, I was so jealous.
When Bambu Lab offered me the chance to try out the H2C 3D Printer, I immediately said yes. And I can confidently say after spending over 200 hours with it, I’m glad I did.
Bambu Lab H2C Review: The setup
The H2C appeared on my steps on a sunny, cold morning in early March. I wasn’t expecting it to ship out so soon, though it only had to travel across the state to get to me, so I suppose I shouldn’t have been too surprised.
It took a little bit of wrestling to get it into my house, but I was able to do it by myself. The box weighs just under 75 pounds, so I’d strongly suggest having two people help if possible.
I had initially figured that I had a perfect spot for it all picked out — the same place that used to house my Ender 3.
I received a pretty brutal reality check when I realized that this model required at least 20 inches from front to back. The Ikea desk only provided 19 inches.
And sure, I could have turned it sideways, and it probably would have fit. But the more I thought about it, the more I realized that I’m not entirely sure I’d trust a machine that weighs the same as a fourth grader to flat-pack furniture.
Fortunately, a quick trip to Amazon to fit a 24-inch by 24-inch steel table took all of a few minutes, and the order was set to arrive a few days later. That worked well, considering I had zero filament in my house anyway and probably wouldn’t for at least two or three days.
Once the table got to my house, it took me about fifteen minutes to put it together, lift my printer onto the table with the help of another person, and begin the actual setup process.
I was anticipating this to be a nightmare, but it was actually pretty easy. Nearly 90% of the process is just locating and removing locking screws and packing foam.
The other 10% is setting up the AMS, if you have one, setting up your account, and letting the machine calibrate itself.
Oh, I should probably mention that before we get much further. This machine pretty much does everything on its own.
It’s not 100% hands off, but I’d assume it’s about as close as you can get. You don’t have to calibrate it, you don’t have to level it — it does it all.
Bambu Lab H2C Review: Examining the design
As I suggested above, this is not exactly a lightweight 3D printer. Bambu does make several models that are smaller than this one, including their cute, open-air A-series.
No, the H2C weighs 71 pounds and stands 19.4 by 20.2 by 24.7 inches. Bambu Lab suggests that it needs a little over 27 inches front to back and side to side, and a little over 43 inches from base to above for clearance.
I feel confident with it on the 24 by 24 inch table, especially as it’s got solid air clearance around it. Not to mention, a fair number of other 3D printing folks already use this table for that exact purpose.
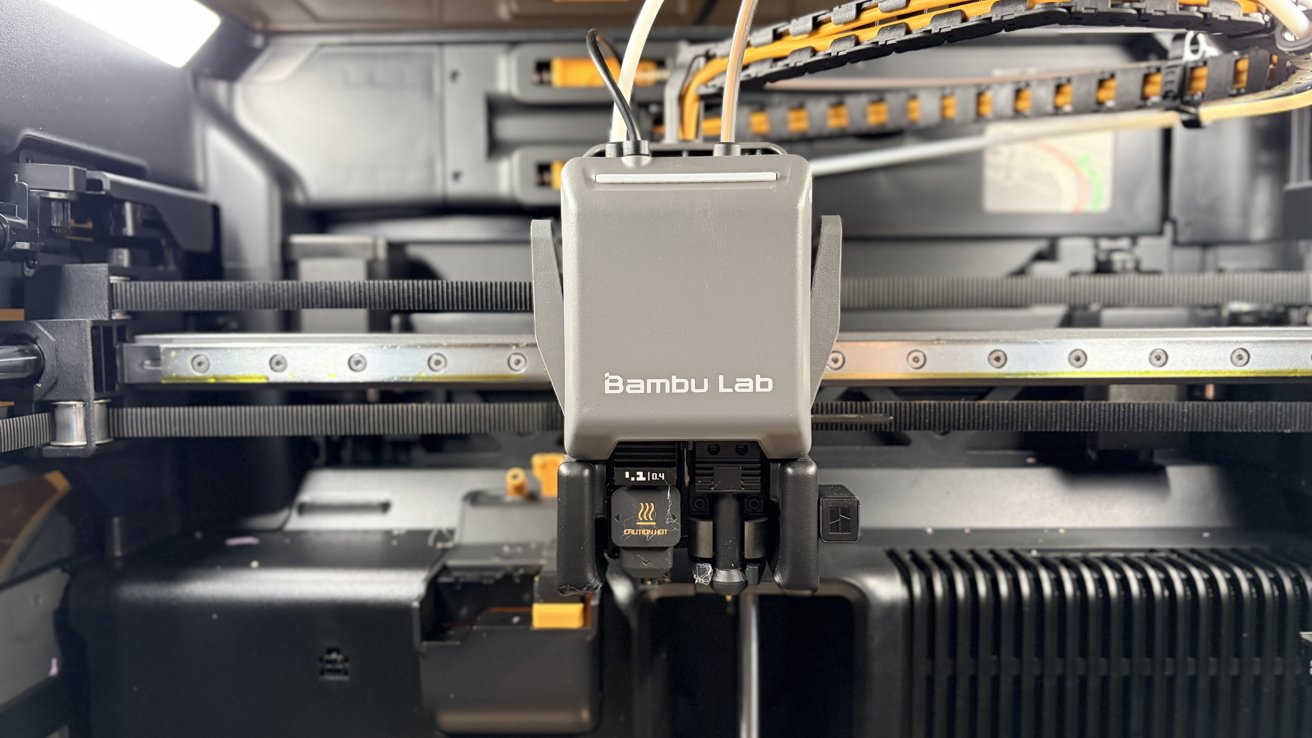 Bambu Lab H2C review: you get two hot ends in the toolhead
The H2C features two hot ends in the toolhead, allowing you to print multi-color and multi-material prints much faster. The printer handles all the fickle filament switching, too.
In addition to the two nozzles in the toolhead, you get an additional five nozzles in the Vortek Hotend Change System. This is, essentially, a rack of hotends your machine can quickly swap between as needed.
The build plate is 305mm x 320mm x 325mm, provided you’re printing from the right nozzle. If printing from the left only, you’ll be constrained to 305mm x 320mm x 320mm.
 Bambu Lab H2C review: Vortek Hotend Change System, which stores up to five hot ends for quick swapping
Still, being able to print a 12-inch by 12-inch by 12-inch object is a pretty big deal.
Bambu Lab also offers an AMS, which isn’t strictly required, but highly recommended. Capable of holding four spools per AMS unit, this system allows for quick loading and unloading of filaments.
The AMS also keeps your filament dry and monitors the humidity levels. If you have filament that is too wet, you can actually use the AMS to dry it out, too.
There are some restrictions on what you can put through the AMS, though. For example, I didn’t know you aren’t supposed to put PLA glow through it; I have to run that off an external spool holder.
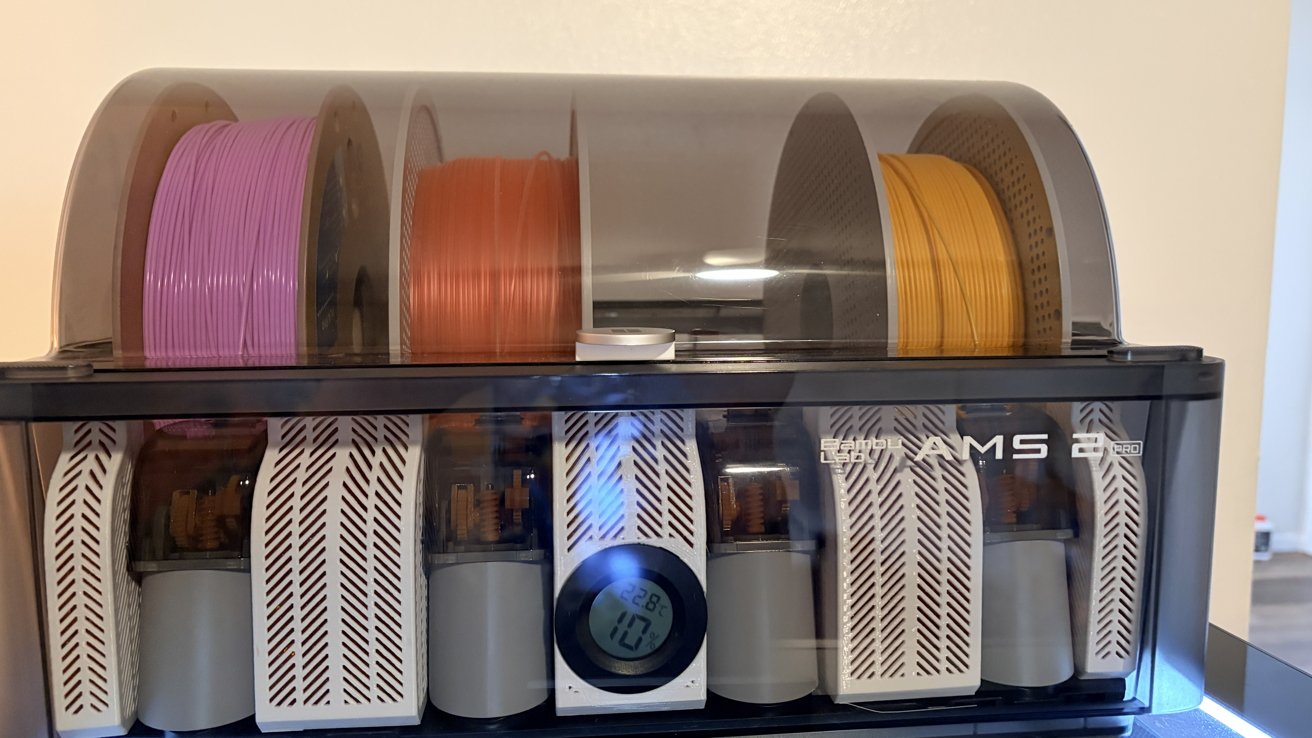 Bambu Lab H2C review: The AMS, sitting atop the 3D printer
Being enclosed also offers you a few benefits over open-air designs. The first is that it means the machine is actually going to be quieter than you’d probably expect.
The primary noisiness from the machine comes from the intake fan and vents. This isn’t terribly loud, and I don’t mind fan noise, so I was fine keeping it in the room where I spend most of my time.
Enclosures also mean you can print a wider range of filaments for multiple reasons. An enclosed bedplate means you can print higher-temperature, more finicky plastics.
It also means you can print plastics that may not be 100% safe to do so without an enclosure.
This brings us to our next section: the wide world of additive manufacturing filaments.
Bambu Lab H2C 3D printer: Plastics, plastics, everywhere
For all you little 3D printing freaks, of which I am now happily a part, let’s discuss what the Bambu Lab H2C is capable of printing. And, if you’re new here, let’s discuss why you might want to use them.
The big four
I’m not going to explain every plastic you can use, but I will explain the big four. If you’re new to printing, these are going to comprise most of your prints.
PLA: Polylactic acid, or PLA, is your cheapest, easiest, and most abundant plastic. Perfect for beginners and for most decorative use cases, PLA, and its subtypes like PLA Silk, PLA transparent, PLA matte, PLA Plus… the list goes on and on.
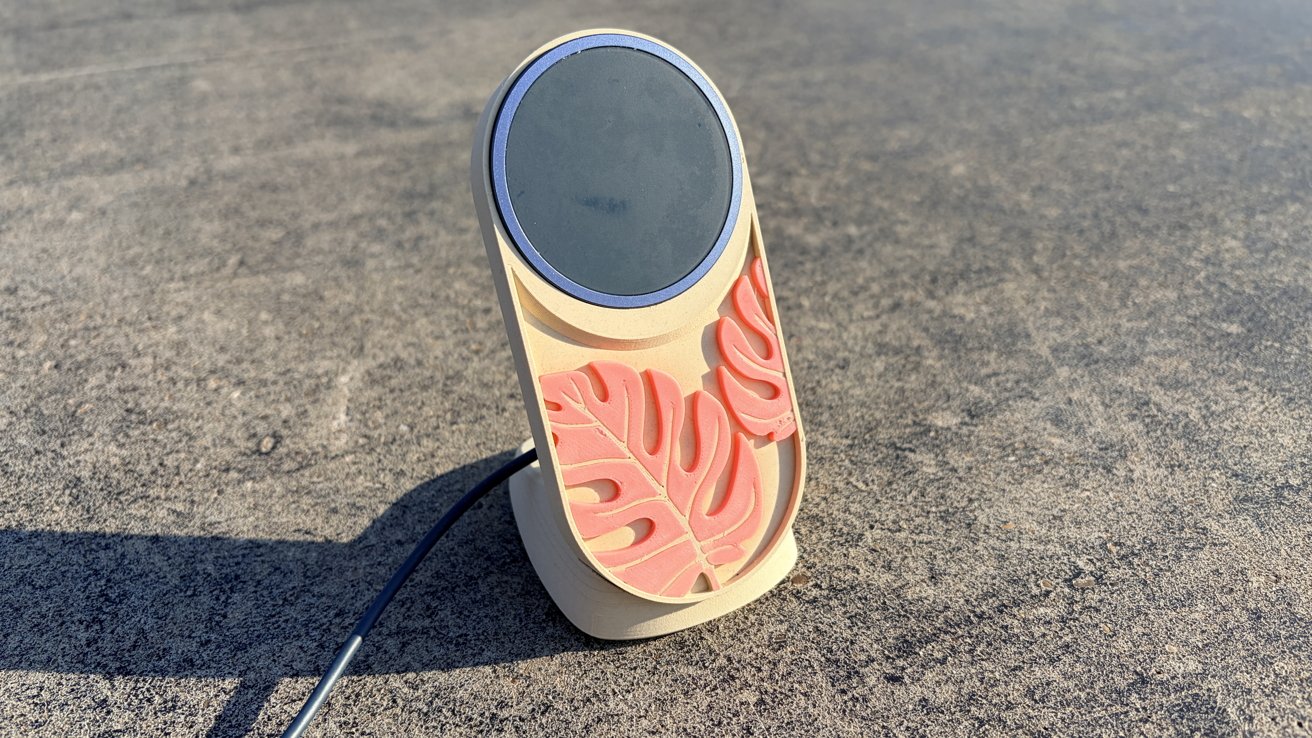 Bambu Lab H2C review: An example of a MagSafe charging stand printed with in PLA wood and PLA glow
PLA is almost a bioplastic, created primarily from cornstarch or sugarcane. It’s not technically biodegradable like most manufacturers claim, but its low melting point means that you actually have a fair amount of options when it comes to upcycling your prints.
The tradeoffs of PLA are noteworthy. Its low temperature resistance means it’s not ideal for outdoor prints or anywhere that might get hot, like an enclosed car on a summer day.
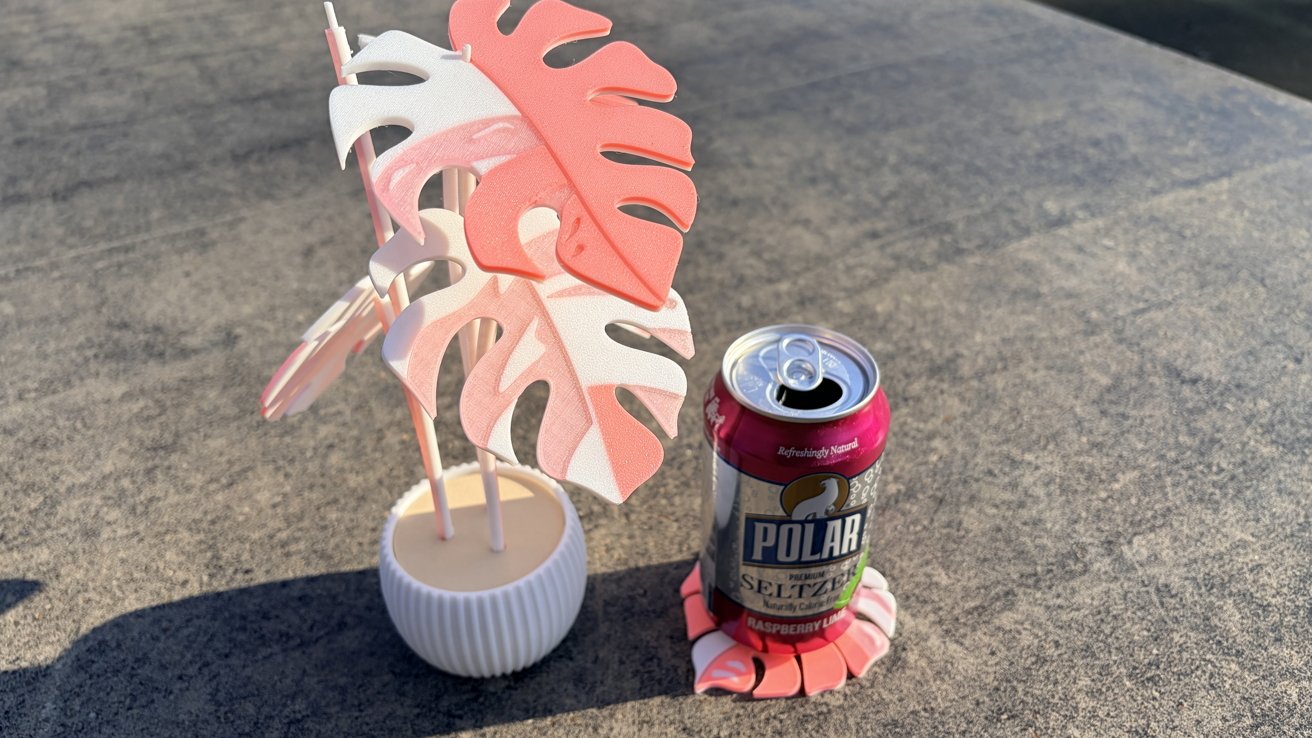
Of course, that low temperature resistance can be a boon, too. For example, you can thermoform it pretty easily with a hairdryer, as I have done here.
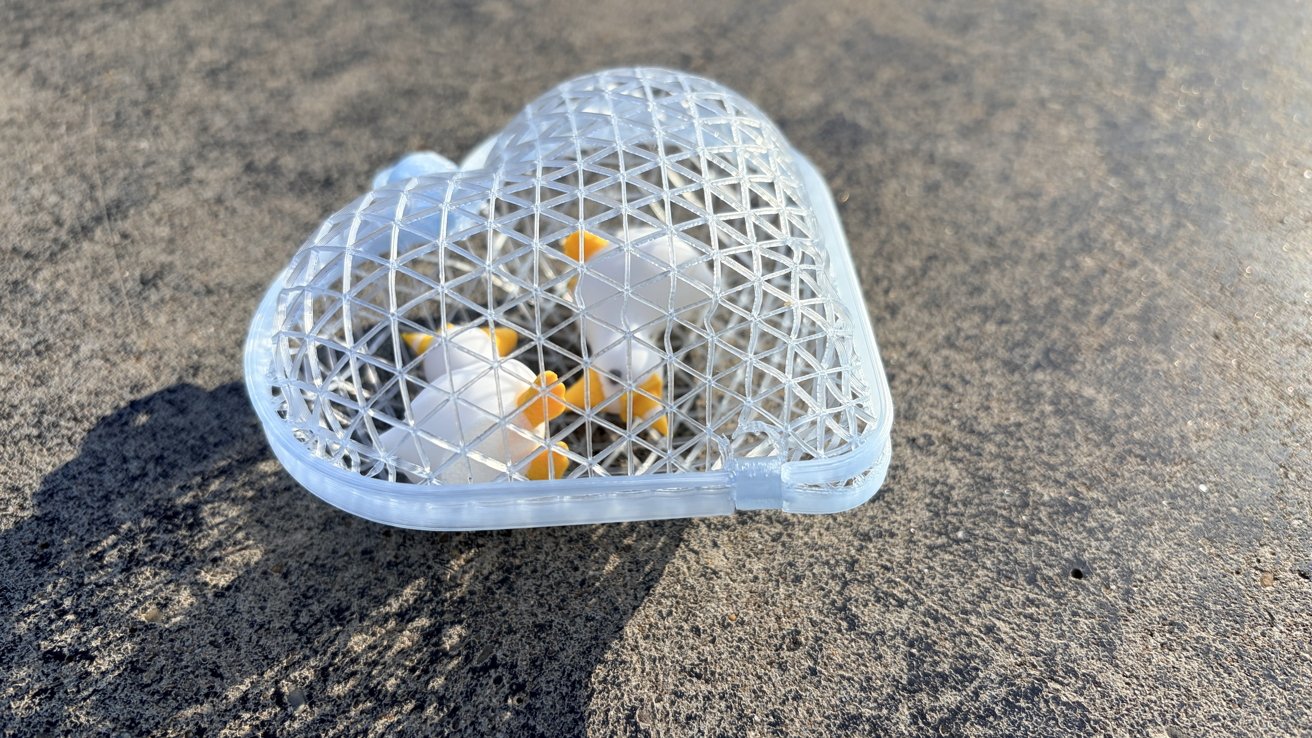 Bambu Lab H2C review: PLA can be thermoformed to create cute containers with minimal filament
PLA will also deform when exposed to constant mechanical stress, like compression or expansion. I would opt for something a little more robust if you’re printing anything that you want to hold up to heavy use over time.
It is also fairly hygroscopic, so you’re going to want to keep it in dry storage, be that an AMS or dry box setup. Because I live in an extremely humid environment, I keep my PLA stored in a gasket-sealed tote with plenty of silica gel pellets.
PET/PETG:
Initially, I was nervous to try anything other than PLA, but I’m glad that I grabbed myself a spool of PETG. It’s another plastic that you should absolutely keep on deck.
Polyethylene Terephthalate Glycol-modified, or PETG, prints easily once you dial in the settings. In the interest of full disclosure, mine printed perfectly using the H2C’s default PETG settings.
The upside of PETG is that it’s significantly stronger than PLA, and its slight flexibility gives it notably better impact resistance. I picked up a spool specifically for its heat resistance, which is notably better than PLA.
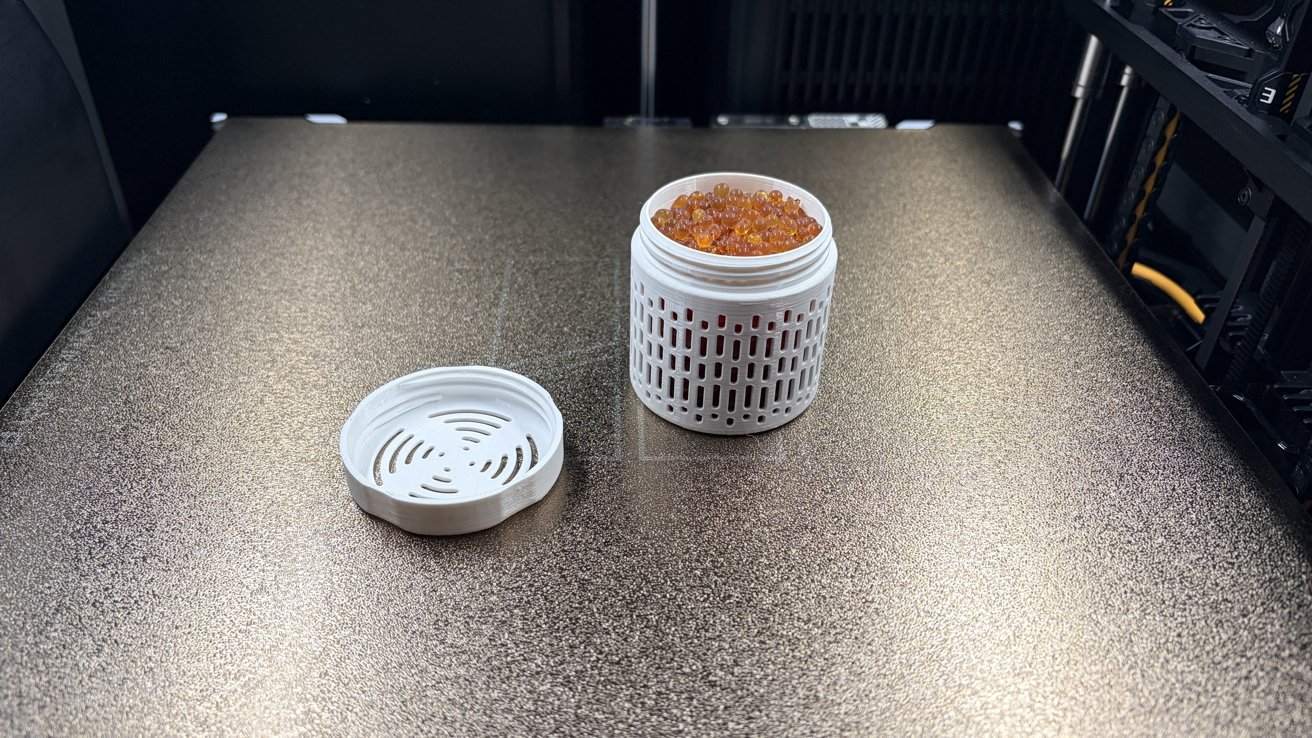 Bambu Lab H2C review: Using PET-G for silica gel holder
PETG has some tradeoffs. PETG is absolutely not biodegradable in the slightest. If you’re going to print PETG, I suggest using it exclusively for things you’re planning on keeping around for a while.
I used PETG to print silica gel holders for the inside of my spools, which were AMS-safe at PLA temperatures. I wouldn’t use it to print any test pieces for larger projects.
Like PLA, PETG is also hygroscopic. You’ll need to keep it in a dry box with the humidity under 20%, but lower is always better.
TPU: Thermoplastic polyurethane, or TPU, is a rubber-like, flexible polymer. At lower infills, it behaves more like a rubber, while at higher infills, it can function more like a stiff foam.
There are a lot of reasons you might want to print TPU. The first is that it makes fantastic inserts for two-part phone cases.
You can also print your own washers, gaskets, and shock-absorbing parts right from the comfort of your own home. Some people have 3D-printed shoes, too.
There are a lot of trade-offs with TPU. The first is that it can be pretty difficult to print at first. It needs to be printed slowly, at a maximum speed of 30mm per second, ten times slower than PLA’s 300mm per second.
TPU is also one of the most hygroscopic filaments the average consumer can get their hands on, despite being hydrophobic on its surface. Drying is non-optional, and proper storage is critical.
However, once you hone in your settings, it’s surprisingly useful. It’s also one of the few times when additive manufacturing has significant advantages over more conventional manufacturing methods.
ABS: Acrylonitrile butadiene styrene, or ABS, is a cheap and durable filament that is pretty easy to get your hands on.
Its durability makes it a popular choice for functional parts like clamps, cogs, hooks, brackets, and more. Its high heat resistance means it’s one of the better plastics to use for outdoor prints, too.
ABS can be vapor smoothed with acetone. This is desirable for any number of reasons, but it is mostly an aesthetic choice for the average home printer.
There are massive tradeoffs for printing ABS. ABS requires an enclosure or a well-ventilated space. The gases it produces are pretty gnarly and toxic; styrene emissions are no joke, and are classified as potential human carcinogens.
I’d suggest not printing ABS in your bedroom or any area highly trafficked by kids or pets. If you’ve got a home workshop, like in your garage, you should be safe.
Truthfully, it’s best to print ABS in an enclosure regardless of the fumes. This filament is prone to warping if subjected to sudden temperature changes, which is inevitable if you’re printing out in the open.
… And the rest
Also supported are:
- PVU
- BVOH
- ASA
- PC
- PPS
- …and their carbon/glass fiber reinforced counterparts
Of course, you can print more plastics than what’s listed here. This is just Bambu’s official list. As long as you do it safely and you know your printing parameters, Bambu Lab’s H2C prints just like any other printer, with the added benefit of being enclosed by default.
Bambu Lab H2C 3D printer: Getting your print on
After you’ve set up your machine and you’ve selected your filament, you’ll want to get things to print. Fortunately, the internet has no short supply of 3D prints you can download.
I’ve mentioned Cults3D in the past. Thangs and Thingverse are also places to check out.
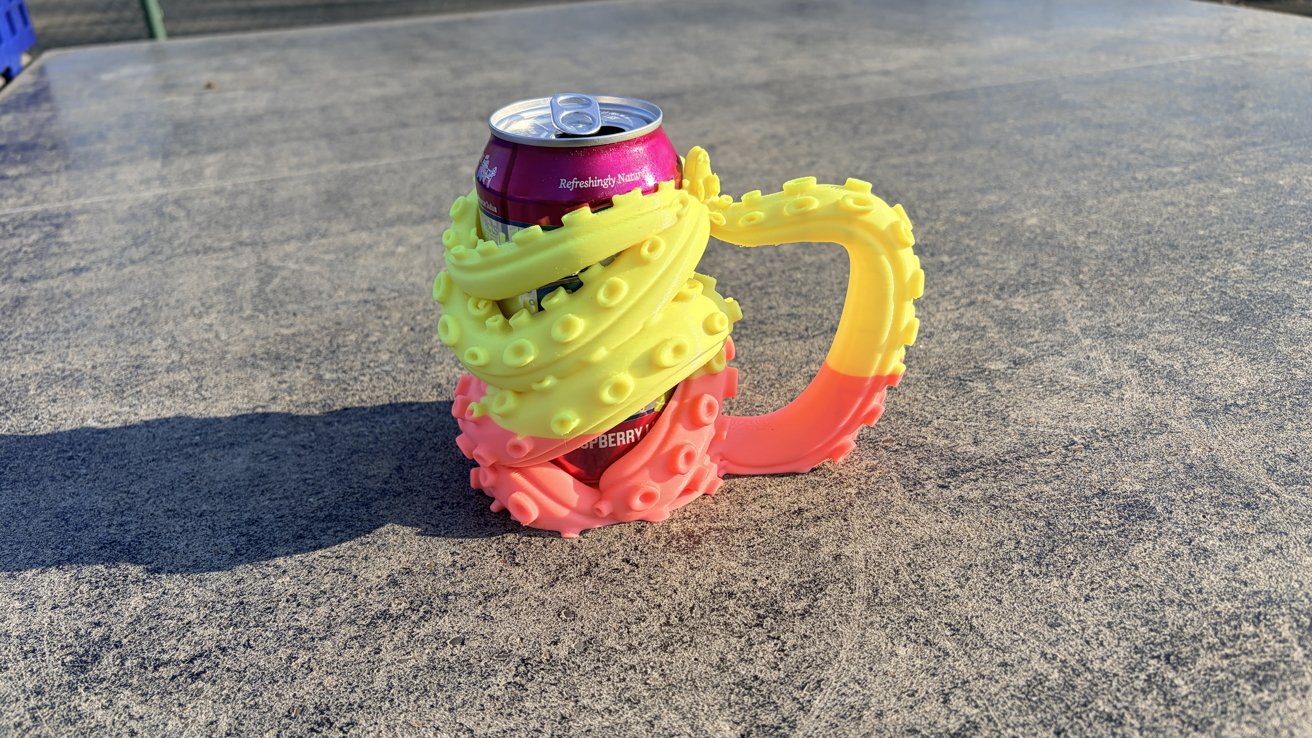 Bambu Lab H2C review: Sure, you can find all kinds of practical prints on Maker World, but you can also find a kraken can holder, too.
My personal favorite, though, is Maker World. Owned by Bambu Lab itself, Maker World has thousands of free 3D models submitted by the community.
I’ve printed so many things from Maker World in the last month since I got my hands on the H2C. I’ve printed MagSafe phone mounts, organization boxes, headphone stands and hooks, build plate scrapers, and filament locks for my spools.
Bambu Lab H2C 3D printer: Software side
While the hardware is undoubtedly impressive, I’d like to take a second to applaud Bambu Lab for making intuitive software. Both the software you can use from your phone or computer, and the software included on the machine.
The tiny little touch screen on the machine is so useful. You can change your hot end and bed temperatures, you can perform calibrations, and you can access stored prints.
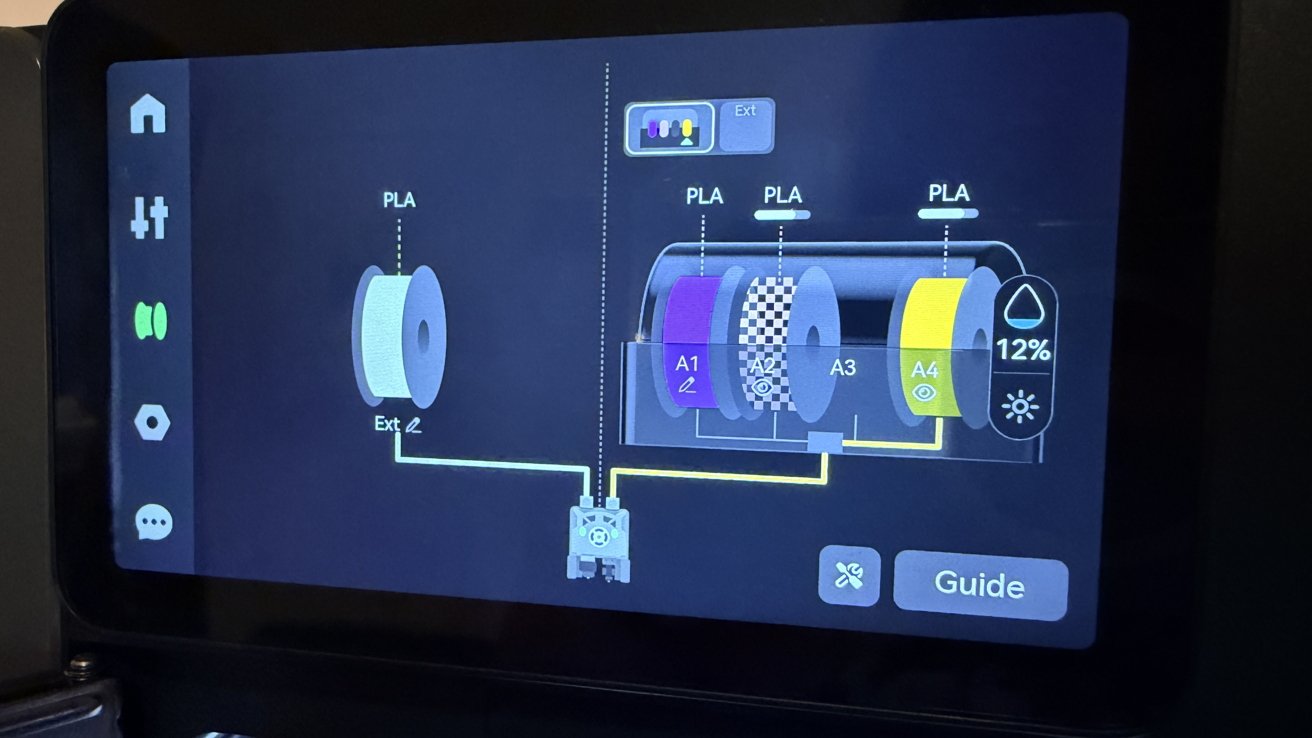 Bambu Lab H2C review: Unloading and loading external filaments is done from the touch screen on the printer itself
If you need to change external filaments, you can easily do so from the machine. If you need to do maintenance or solve a problem, the machine will pop up a helpful QR code you can scan with your phone, and it’ll walk you through the process.
When it comes to Bambu Handy, the mobile app for Bambu Lab machines, it’s also fantastic. While you won’t get the full control of Bambu Studio, it still allows you to download and “throw” prints to your machine.
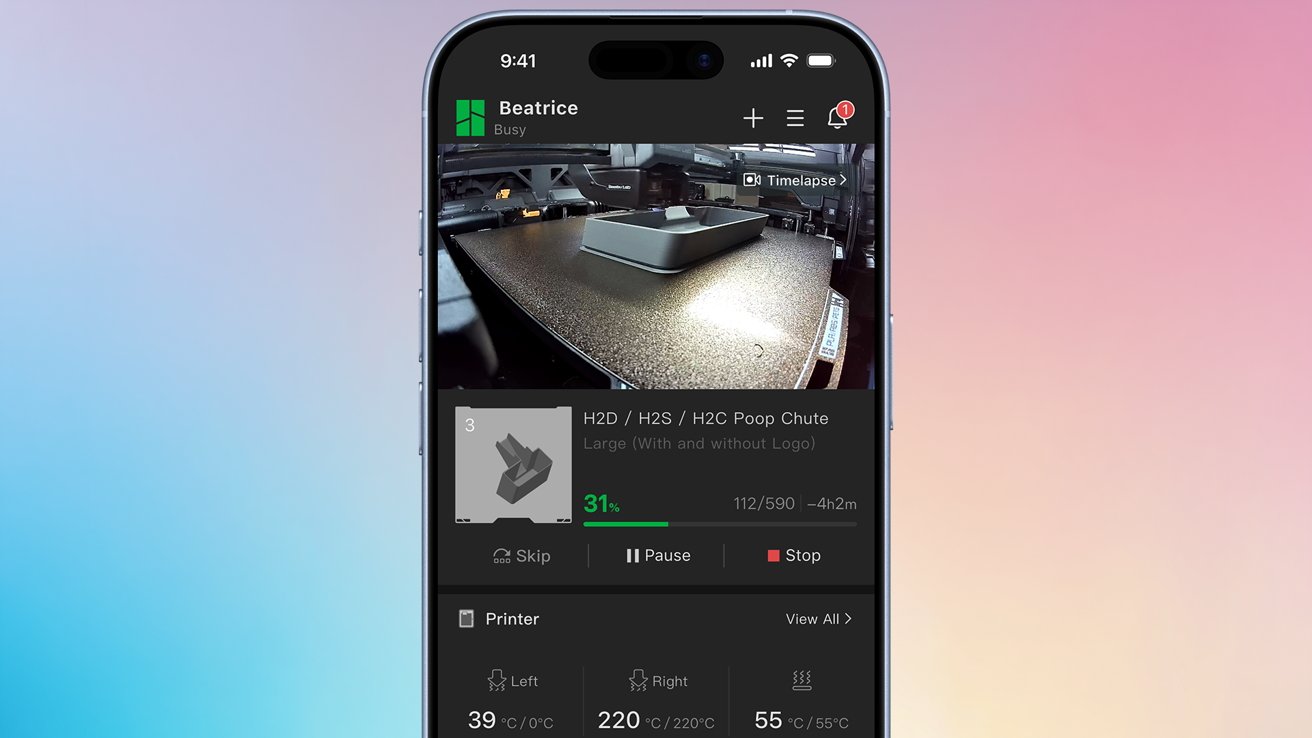 Bambu Lab H2C review: Using Bambu Handy to remotely check up on a print
It also allows you to check up on your prints via the H2C’s birds-eye camera. I love being able to check in on my prints if I’m away from home.
If anything goes wrong, you can stop the print from the machine, app, or desktop application. It really is that easy.
Bambu Studio
I’m breaking this out into its own subsection, mostly so I can talk about it a bit more in-depth. Bambu Studio is a great slicer and machine manager.
I love the fact that Bambu Studio is extremely visually coherent. Even if you’re new to 3D printing, Bambu Studio is very easy to understand.
If you need to make any in-depth changes, like changing print speed or adding brims, you can do that from the prepare tab. If you want to know how much filament you’re going to need, slicing an object tells you the weight, the meters, and the estimated cost based on the type of filament you’re using.
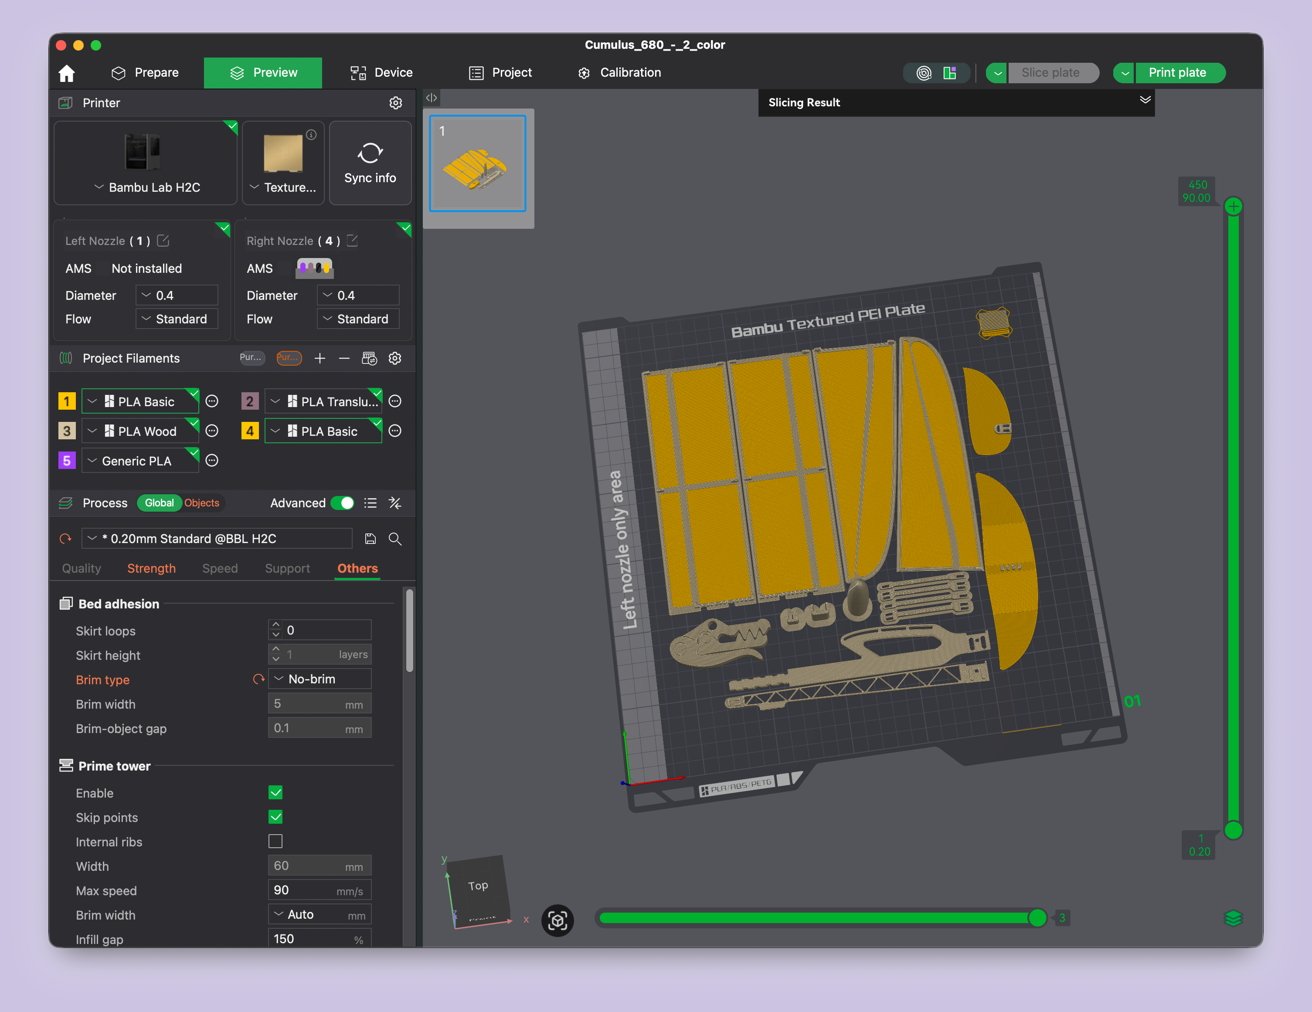 Bambu Lab H2C review: Setting up a glider for print in Bambu Studio
If you need to change material types or colors, the Project Filaments subsection syncs automatically with your AMS. If you’re using Bambu Lab filaments, the machine already knows the material, the color, and how much you have, thanks to an RFID chip in the spool.
Again, none of this ever felt like a headache to me. If you’re familiar with creative software of almost any type, Bambu Studio is extremely familiar.
Most of it is learning the language around 3D printing and being able to locate that within the software. And you’ll learn all the fun little vocabulary words as you progress through your 3D printing journey.
Bambu Lab H2C 3D printer: Less waste, but not zero waste
One of the neat things about the H2C is that it produces significantly less waste than some of its counterparts. A big part of this is because it uses multiple hot ends for different colors.
By quickly swapping out the magnetic hot ends, you don’t need to worry about doing tons of purges. You don’t need to clear out all that green filament to use the purple; you have a hot end for each.
Additionally, Bambu Studio allows you to purge to objects and infill. This means that instead of building a tall waste tower because you need to switch between colors frequently, you can simply use that “waste” filament to make new objects or as part of the infill on the current project.
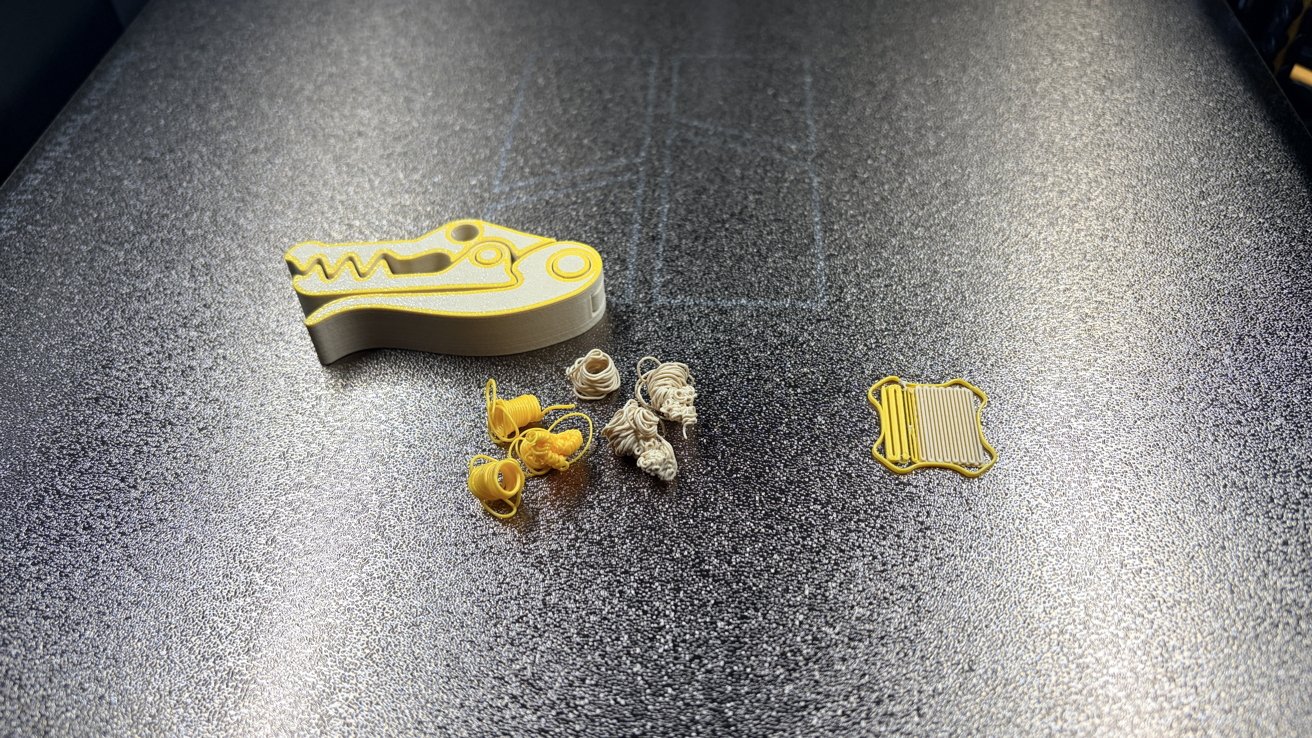 Bambu Lab H2C review: Using purge objects is a great way to reduce waste while printing
I personally like doing both. My current favorite purge object is this little giftable alligator chip clip.
Again, 3D printing is never going to be zero waste, unfortunately. But there are ways to responsibly reduce the amount of waste you create, and even a ton of projects people have made for reusing the waste, too.
Bambu Lab H2C 3D printer: When failures happen
During my time with the Bambu Lab H2C, I printed out dozens of objects and had a handful of failures.
The nice thing about the handful of failures I did have was that they all happened very early on in the printing process. It often happened within the first layer or two, and the machine caught it nearly every time.
The sole exception was an Ergo Grid build I printed, which failed about twenty layers in. That was, however, user error.
In fact, nearly every failure I had was user error. Something is reassuring about that, because it means that the machine isn’t screwing up, I am.
My very first failure was because I cleaned the bed with rubbing alcohol. As it turns out, these textured PEI plates should be scrubbed down with hot water and dish soap, rinsed, and then dried.
I would have known this had I read any official documentation, and not just slapped “print” about 40 minutes after unboxing the machine. As Taylor Swift has said: It’s me, hi, I’m the problem, it’s me.
I suggest drying it by cranking the build plate temperature up and leaving the door open for a bit. This works beautifully, and I clean my plate every four prints or any time I excessively handle it, just to be safe.
My other failures came from inexperience. When printing Ergo Grids or Gridfinity items, it’s a smart idea to brim your work.
By adding a brim around the outermost free edges, you prevent your printer from accidentally flicking your first few layers around. Tiny “island” style parts pretty much require a brim, especially if you’re printing a lot of them very close together.
Another failure I had could have been prevented by reading the comments of a build. I had wanted to print a set of AirPods Max holders right-side up to prevent having to snap supports out of the ear cup holders.
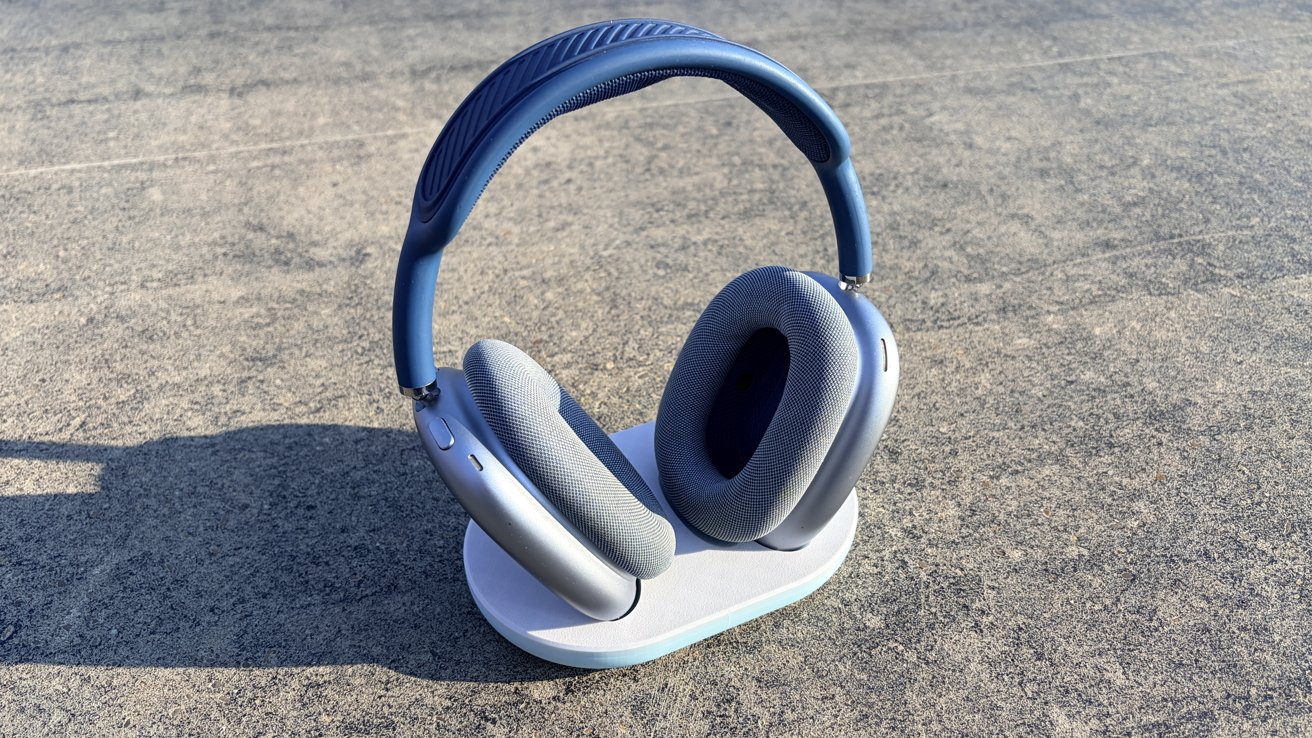 Bambu Lab H2C review: It may have taken three tries, but I did finally manage to print my AirPods Max holder
Due to the way that it was modeled, or maybe the printer itself, this resulted in two second-layer failures. The second I printed it the way the designer intended, it worked fine. Go figure.
Either way, I never felt like I was fighting with the printer, which is refreshing. I’m a very hands-on learner, so failures are more of an opportunity to learn than anything else.
It’s not a bad mentality to have if you’re going to get into 3D printing, honestly. Even with a machine that is as beginner-friendly as the H2C, you’ll still need to troubleshoot and reiterate.
Bambu Lab H2C 3D printer: if it’s broke, fix it
I had initially had a problem with my H2C when it arrived. I wasn’t entirely sure what was wrong, but some simple Googling put me in the right direction.
As it turned out, my rear exhaust fan had a piece that was slightly misaligned due to shipping. It didn’t affect the machine’s usability, but it did make the machine throw an error and make a terrible racket upon startup.
The fix was simple. All I had to do was remove the air filter, gently lift the offending piece back into place, and then put the air filter back.
The entire process took maybe a minute from start to finish. And the craziest thing to me was that Bambu Lab already had a help article ready for this.
One of the things about 3D printers is that, at some point in your time with them, you’ll need to fix something. That is the nature of the beast, unfortunately.
Bambu Lab knows this, which is why it has a truly impressive collection of walkthroughs on how to solve issues. It also has them for maintenance, which your machine will remind you to do when it comes time.
While I won’t say that this alleviated all my fears, it’s made owning a 3D printer significantly less intimidating. Which says a lot, because I can be kind of timid about anything overly mechanical.
Bambu Lab H2C 3D printer: it also features optional lasers!
I’d like to make a quick note here that the H2C also features an optional 10W/40W laser cutting module. I did not receive this for testing, so I can’t tell you how good it works.
I can tell you, however, that if you buy a regular H2C and decide you want lasers later, you can upgrade it to a laser kit after the fact.
Bambu Lab H2C 3D printer: Do you actually need this much power?
While the H2C is marketed towards experienced users who have specific needs, it isn’t exclusively for experienced users. I’m pretty darn new to 3D printing, and if I could figure it out, I’m pretty sure anyone else could, too.
The machine is very good at holding your hand. It tells you what to do when things go wrong. It tells you when to do maintenance on your machine. It monitors itself for spagetification and hot end buildup errors.
Bambu Studio is by far the most beginner-friendly slicer I’ve ever seen. If you’re just printing other people’s files, most of the time you just hit “print plate.”
 Bambu Lab H2C review: Printing has never been easier, but it has been cheaper.
I would argue that this is an extremely entry-level printer in terms of skill needed to operate it. In terms of price, not so much.
And that’s where this was always headed. The Bambu Lab H2C is not an “on a whim” machine.
If you’re a person who is truly starting from square one, I’d head over to your local makerspace and cut your teeth on their equipment. For example, my city has a well-equipped makerspace in the public library.
If you find out that you love it but plan on primarily printing in PLA, I’d argue that this machine is still overkill. You could pick up the pint-sized A1 mini for $219, which would be perfect for apartments, dorm rooms, or anyone who wants to print smaller items without sacrificing space.
If you want a bit more power and some additional options, Bambu Lab’s P2S is a great option. It’s fully enclosed, supports a wide range of filaments, and still comes in under a grand.
However, if you’re someone who already 3D prints and is looking for the Cadillac of 3D printer upgrades, I think the H2C is a great investment. I could see this machine being a boon to just about any hobbyist or maker.
Also, if you’ve got the two grand to throw around, what the hell, treat yourself.
Bambu Lab H2C 3D Printer rating: 5 out of 5 (conditionally)
Bambu Lab H2C 3D Printer pros:
- Fully enclosed printbed
- Highly self-serviceable machine
- Fully auto-leveling bed
- Deep integration with Maker World
- Solid, beginner-friendly software
- Can work with multiple automatic materials systems modules
Bambu Lab H2C 3D Printer cons:
- Expensive initial investment
A word about ratings: Numerical ratings can be tricky. It’s pretty rare that I ever give anything a 4 out of 5, let alone a 5 out of 5. I think, for what this machine purports to do, and compared to many other 3D printers on the market, it certainly earns its praise.
I do, however, think it’s expensive. If you have the money, it’s an easy buy. If you don’t have it, I would suggest opting for a less expensive machine, rather than blowing your budget for this one.
Where to buy the Bambu Lab H2C 3D Printer
If you want to purchase the Bambu Lab H2C, you’ll need to head over to Bambu Lab’s site. It starts at $2,399. If you want to upgrade to the full laser combo, you’ll need to drop $2,949.
You can also get the Bambu Lab H2C from B&H Photo. The Printer combo with AMS 2 Pro is $2,399, but add the 10W laser for $2,949.
Source: www.appleinsider.com
Source link